“I really want to know how to burn an MP4 video to DVD on Mac because I want to share this wonderful video with my family tonight!” When your friend signs up disappointed, you can help him by following the article below. This post will teach you to burn MP4 to DVD on Mac. Read the methods below and choose the best way to save your friends!
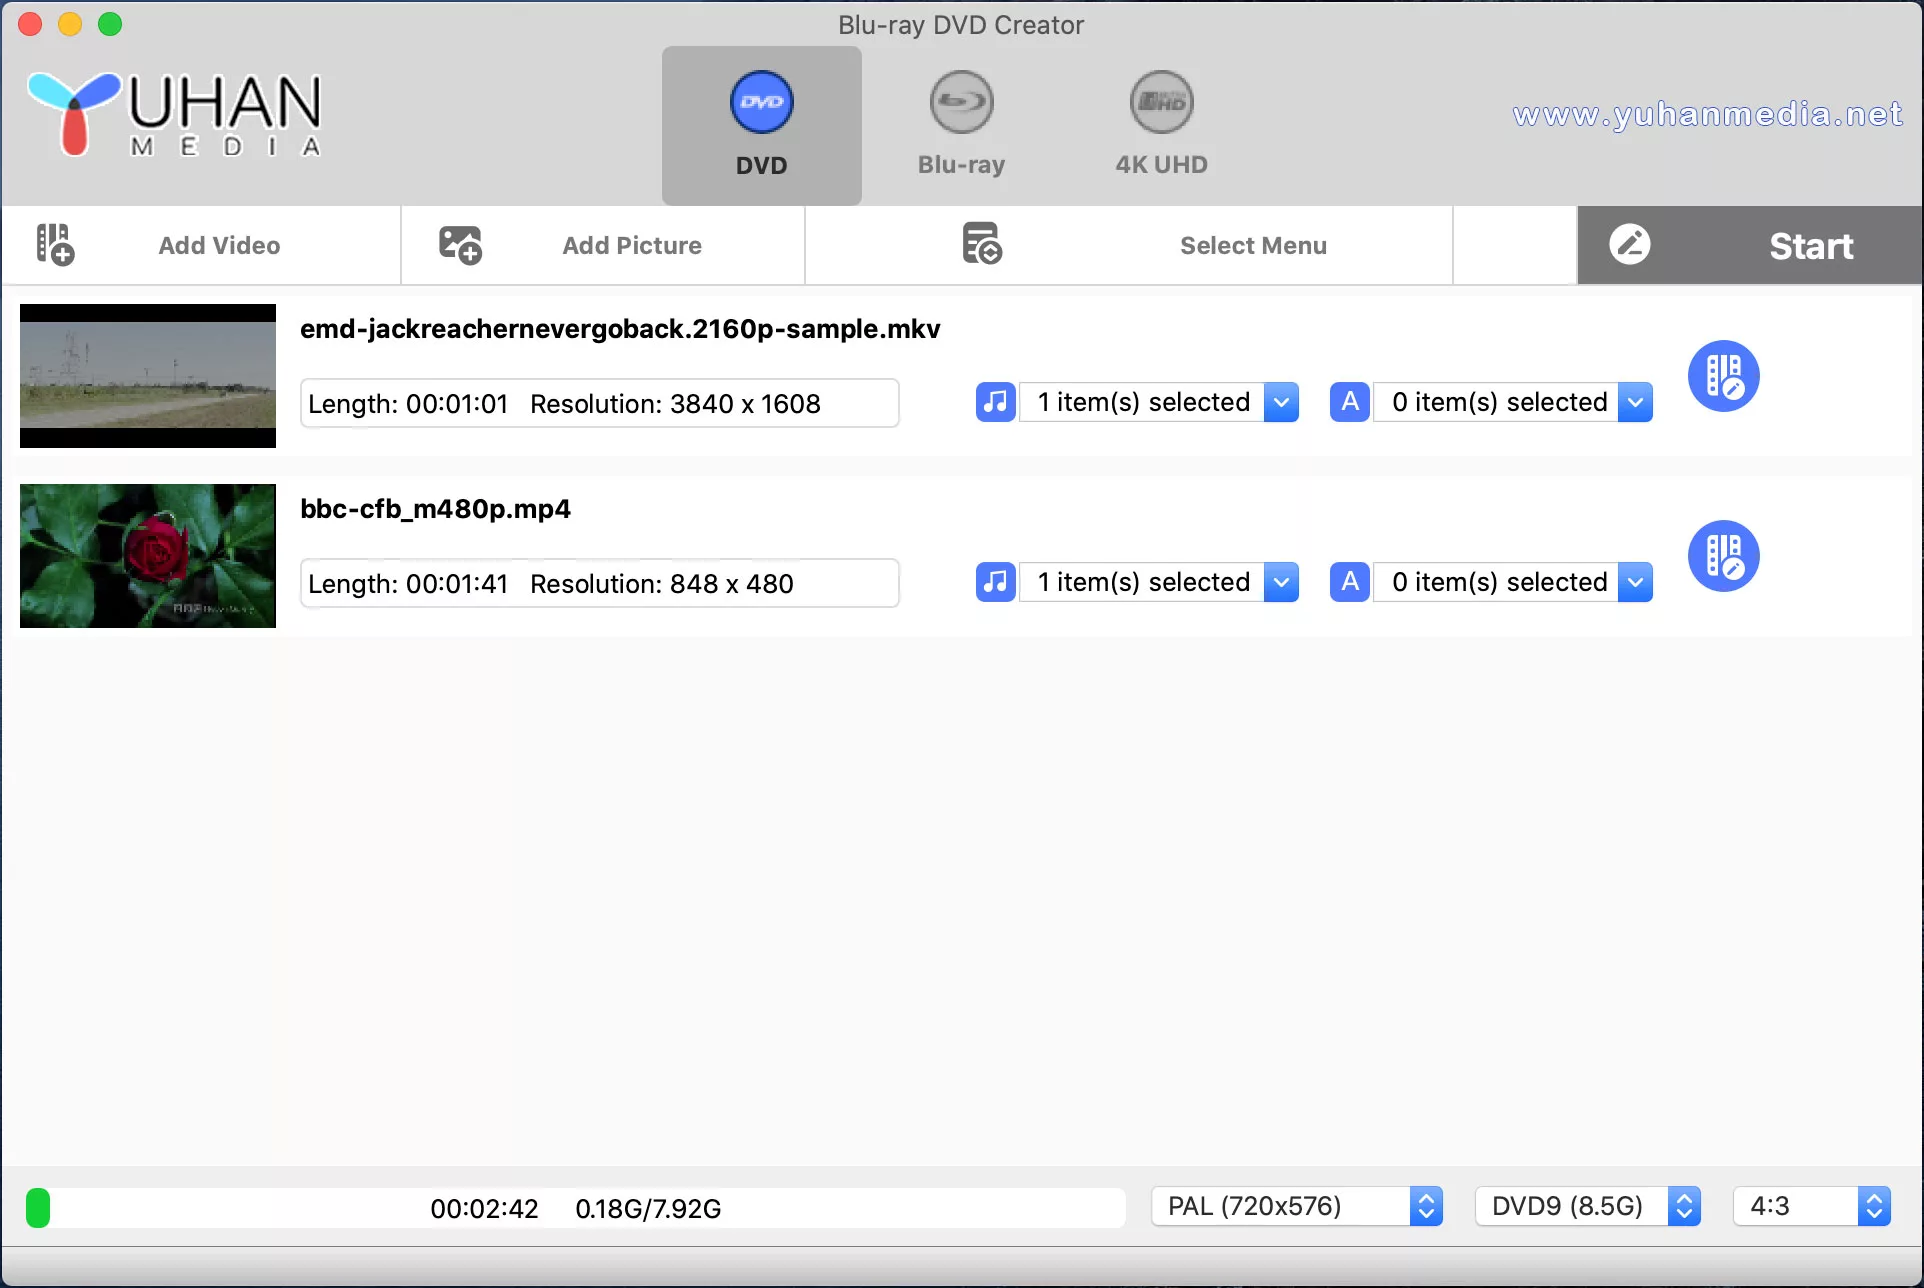
1. Select whether you want to author (DVD, Blu-ray, or UHD). You can set the parameters below. If you want to author a DVD, you can select the format: PAL or NTSC, disc capacity: DVD5 or DVD9, video ratio: 4:3 or 16:9. If you want to author Blu-ray, you can select the video size: 1080P (1920×1080) or 720P (1280×720), disc capacity (BD25, BD50, BD66, BD100), frame rate: 23.976fps, 25fps, 29.97fps, 59.94fps. If you want to author UHD, you can select the disc capacity (BD25, BD50, BD66, BD100), frame Rate: 23.976fps, 25fps, 29.97fps, 59.94fps.
3. You can click the Video Settings button to enter the settings dialog. Here you can crop the video start and end position, adjust the volume (0%-300%), set chapter information, set the audio track and subtitle language.
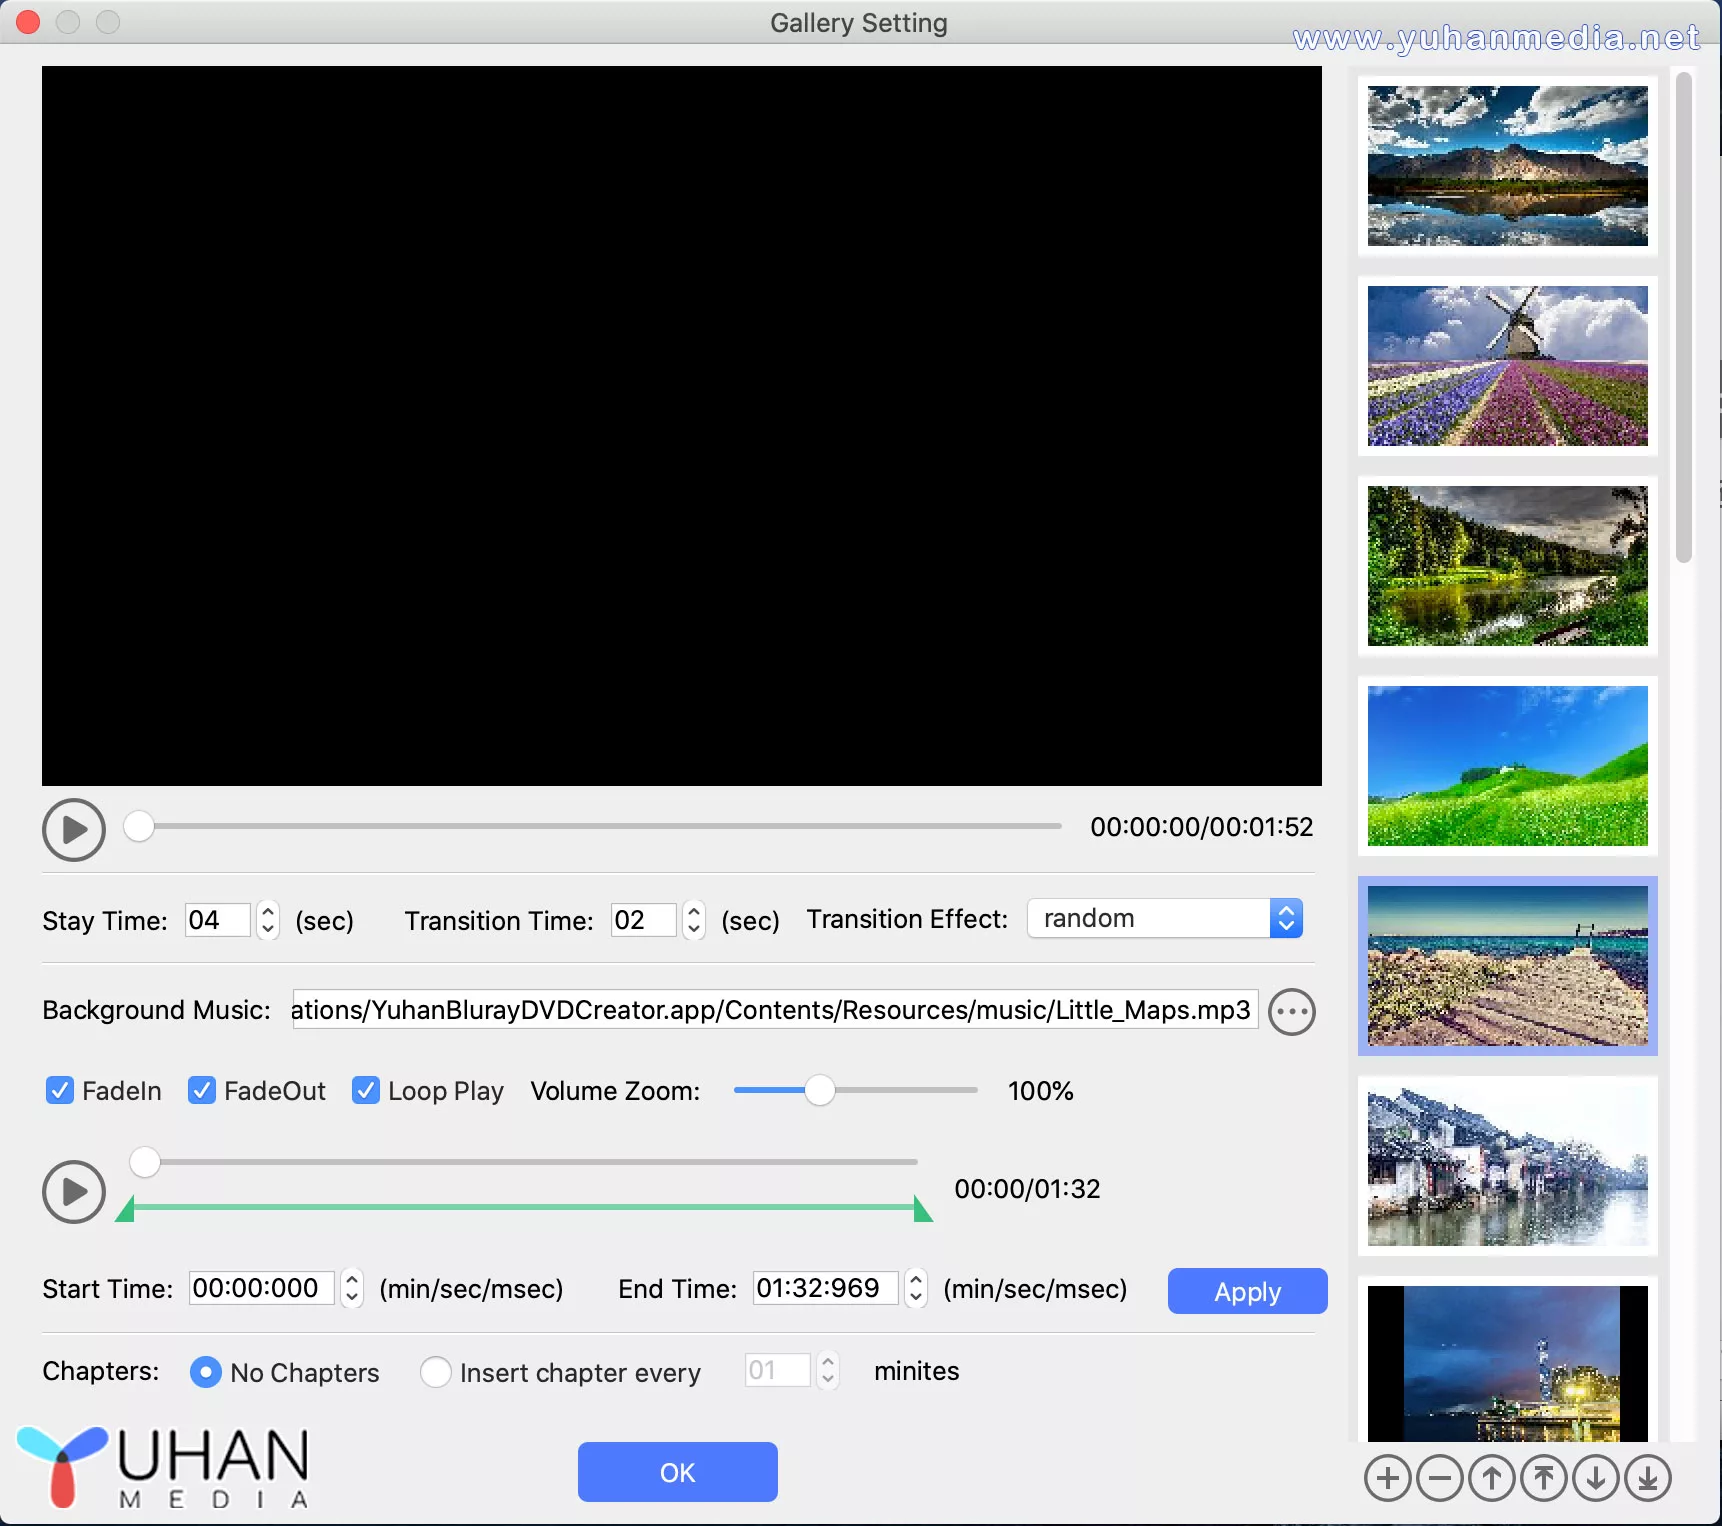
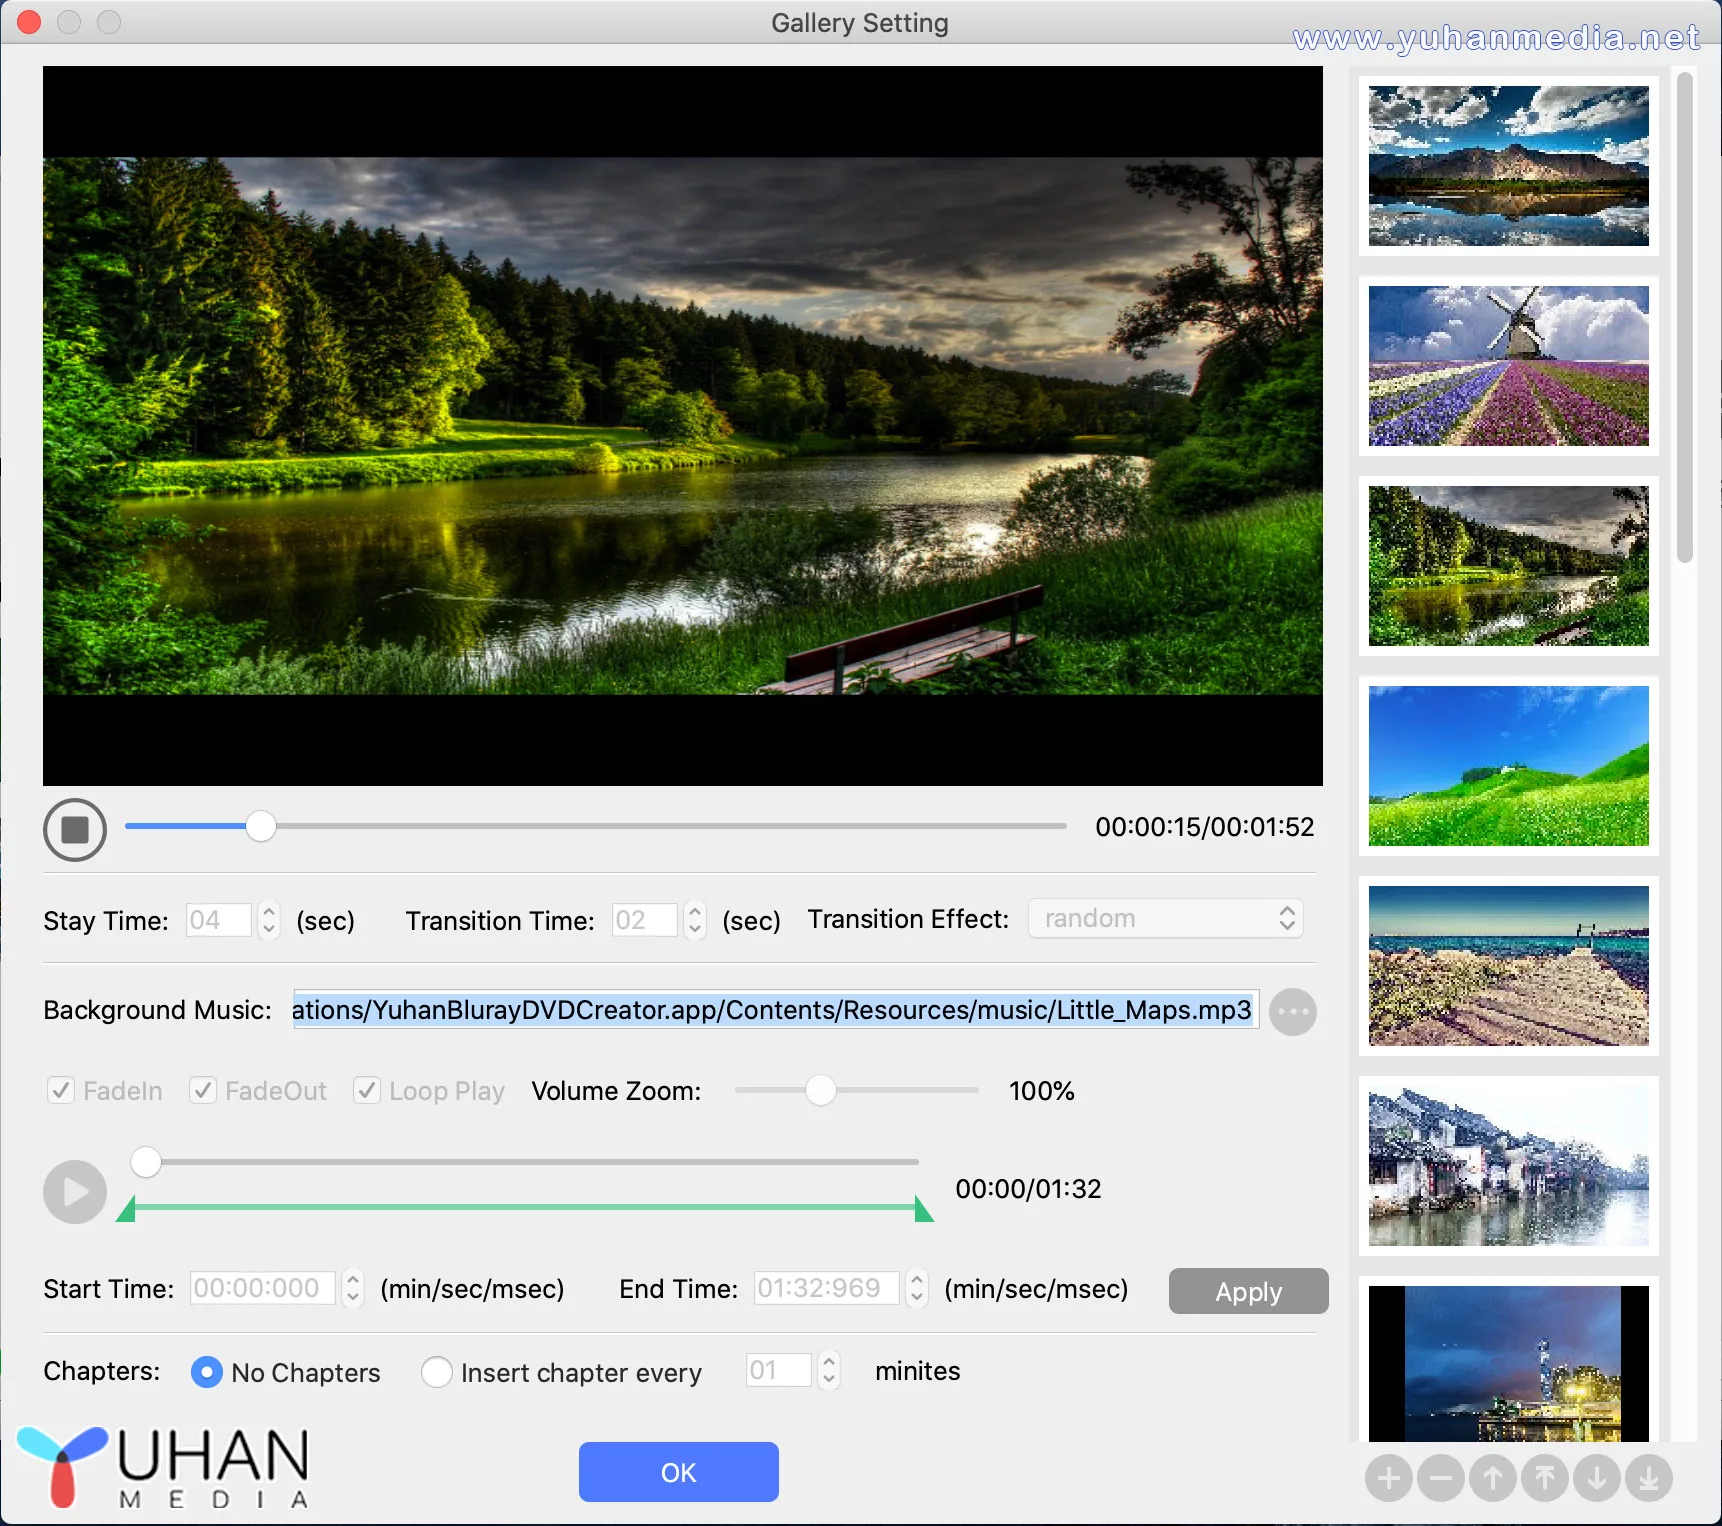
4. You can click the slideshow settings button to enter the settings dialog. Here you can preview slideshow, set image transition effects, set background music and music effect, set chapter information. You can also add images, delete images, adjust the image order, etc.
5. Click the “Select Menu” button to enter the menu dialog, you can choose the preset menu template you like, Yuhan Blu-ray Creator preset 10 sets of menus. You can also customize the menu, drag item to change the position, double-click item to change the text content, set the background image, background music and background music effects.
6. Global Settings. The Language option sets the language of the software. Blu-ray & UHD Processing Mode set trancode mode or passthrough mode. Video decoders and encoders choose whether hardware acceleration or software processing. UHD HDR & SDR choose whether the UHD produced is HDR or SDR. Audio encoder choose 2 channels, 5.1 channels or audio copy.
7. Click the “Start” button to enter the preset settings dialog, you can choose to save as a folder, ISO, or burn to a disc. You can also set the disc volume and the saving path.